Showing posts with label budget friendly. Show all posts

Wednesday, September 16, 2015

Pumpkin Banana Biscotti

I've never made biscotti before, but I pinned a recipe for pumpkin biscotti and had some extra pumpkin from the can I used for the Pumpkin pull apart bread, so I figured I'd give it a go. Turns out they are delicious! I'm not a crispy cookie fan, but it works so well with the flavors of these little bundles. My kids loved them too and I feel good that they are getting some extra veggies and fruit even if it is in a sugary form.

I had a very good helper, but that meant I didn't get a lot of pictures. First, cream the butter, sugar, spices, and baking powder together until smooth and creamy.


Add the banana and pumpkin puree and beat until combined. Then add the flour and mix until just combined. Over mixing will give you gummy biscotti.


On a pan lined with parchment paper, form the dough into two rectangles. Bake for 25 minutes at 350. Allow to cool on the pan for 5 minutes and turn the oven down to 325.


Slice the loaves into 6-10 pieces and put them back on the baking sheet and back in the oven for 25 minutes.


After 25 minutes, turn the oven off, prop it open a crack, and let the biscotti cool down with the oven. The result is a crispy and delightful bite! I would recommend eating these with a cup of hot chocolate or apple cider. 


Pumpkin Banana Biscotti

Adapted from Just a Taste

Ingredients

  • 4 Tablespoons unsalted butter, softened
  • 2/3 cup sugar
  • 1 1/4 teaspoons pumpkin pie spice
  • 3/4 teaspoon ground cinnamon
  • 1 1/2 teaspoons baking powder
  • 1/2 teaspoon salt
  • 1 very ripe banana, mashed
  • 1/2 cup canned pumpkin purée
  • 2 cups all-purpose flour

Method

  1. Preheat the oven to 350 and line a baking sheet with parchment paper
  2. Beat sugar, butter, spices, baking power, and salt until creamy and smooth
  3. Add the banana and pumpkin and beat until combined
  4. Mix the flour in just until combined, over mixing will make the dough gummy
  5. Divide the dough in half and make two rectangles on the baking sheet
  6. Bake for 25 minutes and allow to cool for 5 before slicing
  7. Turn the oven to 325
  8. Slice the loaves into 6-10 pieces and put them back on the baking sheet
  9. Bake for another 25 minutes
  10. Turn off the oven, leave the baking sheet and biscotti in there with the oven door open slightly until it is cooled
  11. Enjoy with a mug of hot chocolate or apple cider

Sunday, September 13, 2015

Easy Bruschetta

Ripe tomatoes, fresh basil, crispy bread, yum! Bruschetta is one of my favorite hot weather meals. It is also super easy and doesn't mean being in a hot kitchen forever.


Start by cutting the tomatoes. 


Saute some garlic in olive oil until it is very lightly browned.


Add thinly sliced basil and the garlic and oil to the tomatoes.


Throw in some chopped onion, a few splashes of balsamic vinegar, some salt, and pepper


Mix it up and bask in the glory of how gorgeous it is. Let it sit in the fridge for about an hour if you have time, if not, it is ready to serve immediately too.


Heat some oil, butter, bacon grease, or whatever your fat of choice is, in a pan and saute the bread until it is crispy and golden brown.


Top the bread with the tomato mixture and enjoy before it goes soggy! We like to eat it with sausages to balance out the meal, but I would be happy to eat the bruschetta by itself.


Bruschetta

Ingredients

  • 6 ripe tomatoes
  • 1 small onion, red if you have it
  • 5-6 cloves garlic, minced
  • 1/4 cup oil
  • 1/4-1/2 cup fresh basil, thinly sliced
  • 2-4 tablespoons balsamic vinegar
  • Salt and pepper to taste
  • your favorite good, crusty bread, I used Wegmans rosemary olive oil bread
  • Oil to brown the bread

Method

  1. Chop the tomatoes, onion, and slice the basil
  2. Lightly brown the garlic in the olive oil
  3. Combine the tomatoes, onion, basil, garlic and oil in a large bowl
  4. Add the balsamic, salt, and pepper. It is super important to just add a little at a time and taste it repeatedly. You don't want it too salty or vinegary. Allow the flavors to combine for about an hour in the fridge or serve right away.
  5. Brown the bread in oil until golden brown and crispy.

Sunday, September 6, 2015

Not So Korean Beef

This is a staple recipe in our house. The Hubby loves it, Sprout loves it, Bean is a little less than enthused, but sometimes he eats the meat. Before you ask what makes it Korean, the answer is... not much. I only call it that because the recipe I modified it from calls it that. It is another small list of ingredients meal that packs a lot of flavor. We eat it over rice or quinoa.

I start with a little sesame oil and plenty of garlic.


When the Garlic is softened, but not brown, add the ground beef.


Brown it well and then add frozen (or fresh) veggies of your choice. I used mixed veggies because I had extra from another meal. The sauce ingredients also go in at this point, but I don't have a good picture of that for you.


Let the veggies heat through and you are ready to serve. I like to top mine with green onions, some toasted sesame seeds, and a little sriracha or red pepper flakes.


Not So Korean Beef

Ingredients

  • 1 lb ground beef
  • sesame oil
  • 10 oz frozen veggies (or as much fresh as you want)
  • 2 (or more) cloves garlic, minced
  • 1/2 cup brown sugar
  • 1/2 cup soy sauce
  • 2 teaspoons fresh ginger, grated; or 1 teaspoon ground ginger
  • A splash of fish sauce if you have it (it adds a little extra umami flavor)
  • Optional toppings: sesame seeds, green onions, red pepper flakes, etc

Method

  1. Heat sesame oil in a pan and add garlic
  2. Cook just until softened and add ground beef
  3. When the beef is cooked through, add the veggies, brown sugar, soy sauce, and ginger
  4. Allow the veggies to heat through and it is ready to serve

Sunday, April 26, 2015

Roasted Cabbage

Before I dive in and tell you about this recipe, I have to celebrate a little. I RAN A 5K YESTERDAY!!! My time was 36:20, which is by far my fastest for a three-ish miler. For a long time I didn't think I could run because of some lung issues from pneumonia when I was a kid, but now I can run for three full miles! Ok, now to get back to the real purpose of this blog, delicious food.

I don't think I can ever stop saying how much I love roasted veggies. It is my favorite way to eat just about any of them. Yesterday with our salmon we had roasted cabbage. It gets sweet and a little nutty when you roast it. Cabbage is not a huge hit in our house, but I love that it is cheap and filling. The Hubby eats it because it is in front of him, but the kids are not interested. More for me!

Start with about half a head of green cabbage. Red or savoy would work as well, green is what I had on hand. Slice it and remove the core. My slices were about half an inch thick.


Drizzle with olive oil and add salt, pepper, and whatever seasonings you enjoy. I used garlic powder and smoked paprika.


Roast it is a 425 degree oven for 20-30 minutes or until cooked through and a little browned.


Plate it up and enjoy the cabbagy goodness!


Easy Roasted Cabbage

Serves 4 as a side

Ingredients

  • 1/2 head green cabbage
  • 1-2 tablespoons olive oil
  • Salt and pepper to taste
  • Other seasonings you enjoy to taste
  1. Preheat the oven to 425 degrees.
  2. Slice the cabbage into 1/2 inch slices and remove the core.
  3. Place on a lightly oiled baking sheet.
  4. Drizzle with olive oil and add seasonings
  5. Roast for 20-30 minutes or until cooked and lightly browned


Wednesday, April 22, 2015

Egg-Free Pancakes

There are a few things I can count on everyone in the family eating, breakfast for dinner is one of them. After modifying a bunch of other recipes, I finally found this one  and after a couple modifications, they are delicious!

Combine dry and wet ingredients and whisk.


Make sure you don't whisk too much. Lumps are just fine.


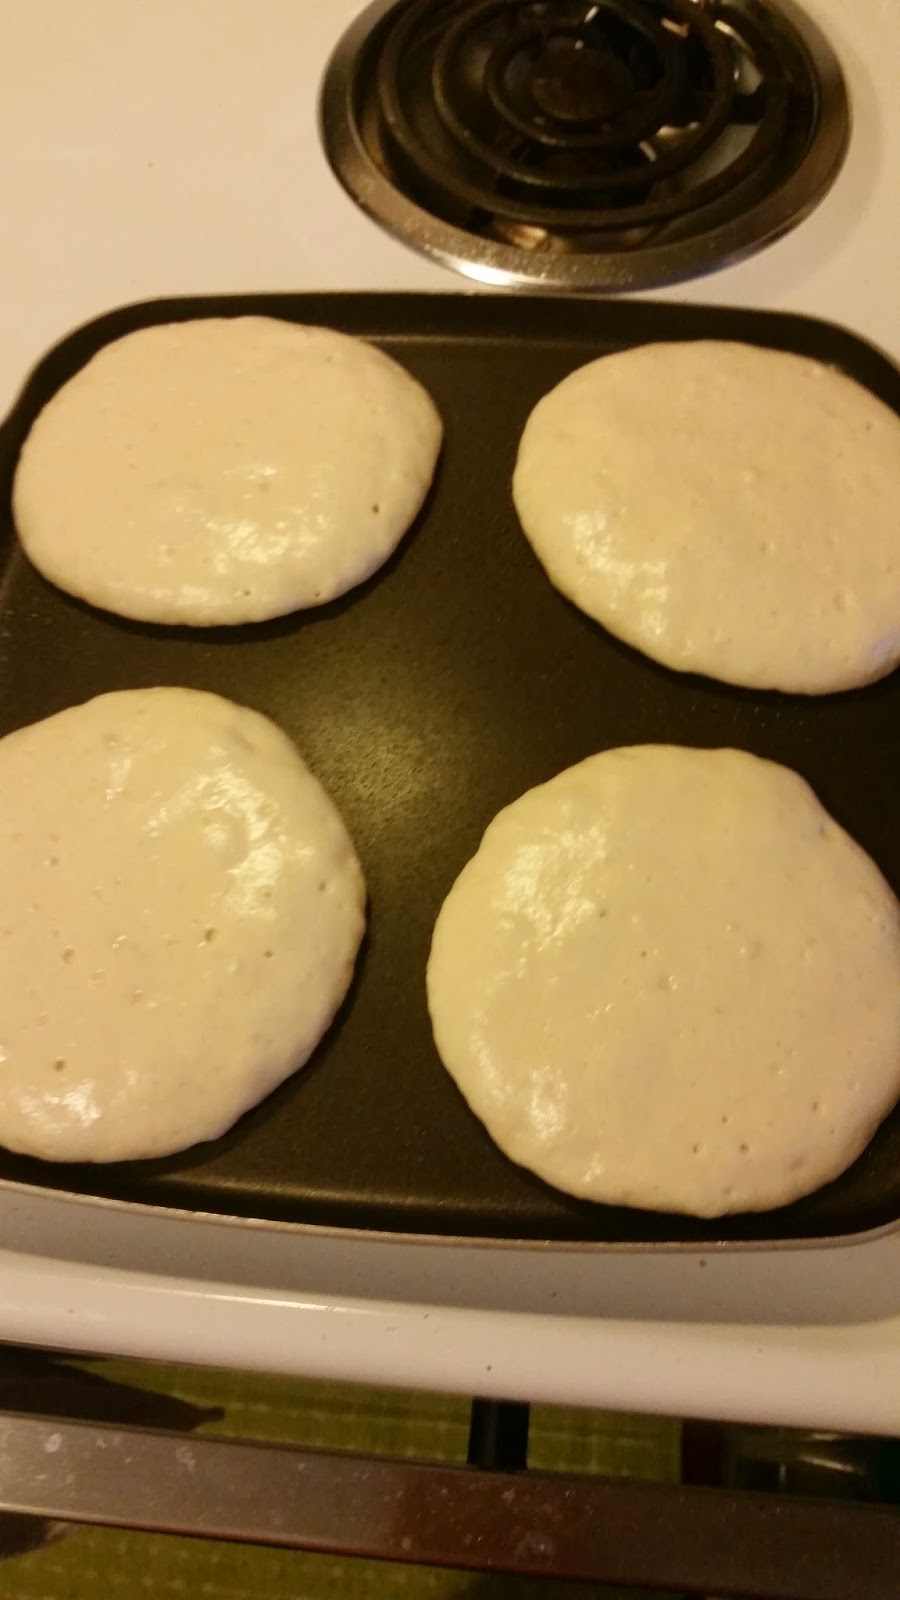
Scoop out about 1/3 cup for each pancake.


Let them get a little bubbly on the top and then flip. My pan is pretty warped. I should probably get a new one.


Let them cook on the other side for a bit and then plate them up! Look at those golden brown beauties!


Ingredients

2 1⁄2 cups
 all-purpose flour
2 tablespoons
 baking powder
3 tablespoons
 sugar
1⁄2 teaspoon
 salt
2 cups and 2 tablespoons
 milk
4 tablespoons
 vegetable oil

Directions

  1. Mix together flour, baking powder, sugar and salt in medium bowl.
  2. Combine milk and oil. Add to dry ingredients.
  3. Stir just until moistened.
  4. Bake on a hot, lightly greased griddle.
  5. Pancakes are ready to turn when tops are bubbly all over, a few bubbles have burst, and the edges begin to appear dry. Use a quick flip with a broad spatula to turn pancakes. Turn only once.
  6. Continue to bake until bottoms are brown and dry.
  7. Refrigerate leftovers within 2 hours.


Tuesday, April 21, 2015

The Best Broccoli

I know, the best broccoli? Sounds like a pretty ridiculous statement. Not so! Roasted broccoli will change your life. It has certainly changed ours. The Hubby is not much of a veggie man. He'll eat them if they are part of the meal, but he won't ever really go back for seconds. Then I found roasted broccoli. Frozen broccoli, olive oil, and seasonings. The Hubby could eat a whole pan of this stuff by himself, without any prodding from me. He LOVES it. I think the smoked paprika could be a big factor. The regular stuff just isn't good enough for us anymore. Once you go smoked paprika, you never go back.

Step one: Preheat the oven to 450. Open a one pound bag of frozen broccoli and put it in a big old bowl. Pardon the bad picture.


Step two: Odd the olive oil, I used 1/4 cup for the pound. Add seasonings and toss.

Step three: Dump the bowl out onto a baking pan and roast for 30-40 minutes. Keep an eye on it so it doesn't burn.


Roasted Broccoli

Serves 4 as a side

1 pound frozen or fresh broccoli
1/4 cup olive oil
1 teaspoon salt
1 teaspoon garlic powder
1 teaspoon onion powder
1/2 tablespoon smoked paprika

1. Preheat oven to 450. 
2. Combine broccoli, olive oil, and seasonings in a bowl.
3. Pour broccoli onto a baking sheet and roast for 30-40 minutes, until cooked through and slightly browned.
4. Try to not eat the whole pan by yourself.

Thursday, April 16, 2015

Spaghetti Night

If there is one thing I can count on my whole family eating every time it is spaghetti. With or without meat, all three of my boys are spaghetti fiends. My favorite thing about it? It is one of the least expensive meals I can make. One pound of spaghetti and a quick homemade red sauce make for some seriously good eats.

I start out with getting a pot of water going for my pasta and then start in on my sauce. I saute some onion and garlic for a few minutes until they get soft and fragrant.

Then comes the easiest part, I open up a can of crushed tomatoes and a can of tomato paste and in the pot they go.


After the tomatoes go in, I throw in some Italian herbs, salt, pepper, and a touch of sugar to cut the acidity of the tomatoes. One of the problems of being an intuitive cook is that I hardly ever measure my spices and seasonings, but I'll do my best to get a decent measurement in the recipe. I cook by taste when it is something like this. Once it tastes right, I let it simmer while my pasta cooks.


Basic Red Sauce
  • 2 tablespoons olive oil
  • 1 small onion, diced
  • 3-5 cloves garlic, diced
  • 1 28oz can crushed tomatoes
  • 1 6oz can tomato paste
  • 1-2 tablespoons italian seasoning
  • 1 teaspoon salt
  • cracked black pepper to taste
  • 1 tablespoon sugar
  1. Saute the onion and garlic in the oil until softened and slightly browned
  2. Add the tomatoes and tomato paste and stir to combine
  3. Season and adjust as needed
  4. Simmer until heated through
Note: You can add one half to a full pound of ground beef or sausage to this sauce to up the flavor